For the final episode, I actually had much grander plans for how the last few minutes would play: a montage of Richter Mode with the "thank you!" voice over. But, oddly, I had tons of time between the endings playing out and I Am The Wind's interminable running length. In an effort to keep this episode to a respectable running time, I thought the montage would be overkill, so I scrapped it in favor of tightening things up. See? You guys told me that you didn't like silence, so I kept it to a minimum.
It tugs at me, though, that the finale of the video series winds up with I Am the Wind, but it just doesn't make sense to elongate the episode. Sorry if you may have found it slightly anticlimactic, but I hope you understand the reasoning now. If anything, this is the only episode where I wished I had more to talk about. Maybe it was just the grieving process for it ending starting to take hold or something, but I really wracked my brain (and my notes) to include anything else I possibly could, but everything left was stuff obviously read in-game (like how large the dev team was, which is clearly indicated in the credits that you would be watching).
And there we have it. One major project in the books. To answer some questions that I've gotten about this all happened, here's... How Some of the Sausage Was Made, Part 1
The voice recording was done with a Blue Snowball microphone. I have a friend that freelances as a voice actor and some other pals that podcast, and they unanimously recommended it to me for the quality it delivers at the price it sells for. It really did a hell of a job for a USB mic, and I can't say enough good things about it. I'm sure I could have done more research and found something better, but I'm not an audio engineer, so it was perfect for me.
I recorded all of the voice overs using Audacity, which is a freeware program that anybody can download and use. At first, I found it kind of obtuse, but since I wasn't really doing anything super fancy with it other than recording, editing, and then exporting into .mp3 format, it did the job. I would generally write a script first and then edit it a bit (not a lot, which is a flaw of mine that other editors probably hate about me) before launching into the recording, and then I would edit the recording immediately after. The recording process probably took a little over an hour per episode based on how many mistakes I made that needed to be corrected. I'm not a professional narrator or anything, but I've taken a handful of acting classes when I was in college (English majors could do that as electives, you see), and recalled some of the golden rules when I needed them most. The best, in this case was "slow down," because, like everyone else, the faster you do things the more likely they are to turn out rough, and this includes reading a script that you wrote yourself.
Generally, after editing the sound, I would walk my laptop over to my PlayStation 3 and jump right into the game footage capture, which was done using an Elgato Game Capture HD and Elgato's capture software. This was generously loaned to me by a friend, and not a moment too soon. At first, as I was trying to do this whole thing on a budget and decided to simply emulate everything. The problem is that I'm using a laptop that's a little more than three years old now, and wasn't even close to top of the line when I bought it. Though I was still using a disk to play Symphony using ePSXe, the frame rate would drop at very inconvenient times, and after doing a test run of the game, I just knew in my guts that it would be compromised if I did the final videos this way. Thanks to the good will of a good pal, the Symphony footage in the series was taken off of a PS3.
Everything else you see is emulated, though. Even though I own all of these game in one form or another (except one of them. No, I won't tell you which) (ok, it's Kid Dracula) (Kid Dracula sucks), I didn't have the Elgato handy during the early research period, and found it best to just download roms off of the internet. At first, though, I still didn't have a clear idea how to capture the footage. After a little research, I settled on FRAPS, which is a free software specifically for game capture, but a small fee gives you a few extra bells and whistles, as well as the removal of a FRAPS watermark on every video. It may sound kind of snobby, but having a billboard for computer programs all over most of my videos was not something I was happy about, so I spent the $37 on the full version of the program.
This is where things get stupid, though. When the laptop was new, it was loaded with the horrendous Windows 8 with the promise of a free update to 10 sooner than later. Since I never wanted to deal with 8, I never did a lot of experimenting with it, and when 10 finally came, I had no idea that the on board Xbox software had native video capturing, so most of the older games and side bits of Symphony were captured using that when I finally realized it was there. FRAPS was still useful, though, as some things didn't play nicely with the Xbox software, so the money was still well spent.
Lucky for me, though, I never throw anything out, and boxes full of old-ish stuff really helped me save a bunch of cash on this. A few years ago, a friend of mine gave me his old PlayStation 2 (I had traded up for a backward compatible PS3 when they were new. When it died a noble death, I was stuck with a mountain of unplayable PS2 games for years), but with a busted controller. I went ahead and hunted down an OEM PS2 controller, and just happened to have a USB adapter for it that I had bought on a work trip to Cincinnati when I wanted to play Final Fantasy VIII on my work laptop (maybe around 2008? I can't remember). As my wife and I are people with thousands of compact disks sitting digitized on a hard drive, we looked slightly ahead and bought a 1TB external drive to back everything up a few years ago, and this is where all of the captured video was stored.
All of the video editing was done using Sony Vegas Pro 11, which is now a pretty old version of the program. This was also gifted to me by the friend with the Elgato, and it took some work to get it to do what I envisioned with this series. The learning curve was steep, but not as bad as it would have been without YouTube and the ocean of tutorials on it. I've come to find later that while SVP may not be as ubiquitous in the editing community as the Adobe suite of products, it worked great. I've also found that it's very affordable for what it can do (at least, for what I used it for), so it gets the thumbs up from me.
Finally, yes, I was using the copy of Symphony that my parents gave me for Christmas just after my 18th birthday. It will never leave my possession if I'm still of sound mind.
Tomorrow, I'll post what is a photographic tour of how this all came together.
Unlike this Appendix entry, I thought this episode would be a challenge to make, but it came out pretty quickly. EXCEPT when I did a test run of the areas and saved the game without recording anything. Yes, boneheaded move, and yes, it happened before. I had a backup run at what I thought was the same spot, but found that I needed to bum rush a good chunk of the game to get back to the point of recording. So, if any of you detect something off about the weapon loadout, HP count, and conspicuously absent number of relics that briefly appear on the list, this is why. A little bit of sausage-making for you. I was even still equipped with the Spike Breaker armor, which you can clearly see when I fly through the specific room in the FC, much to my own surprise (and delight because I would have probably been killed).
Something I forgot to mention: Most Symphony players know this pretty well, but I neglected to point out that by skipping the Death scene and hanging on to the Alucard Shield, the game is shattered the moment you find the Shield Rod. I didn't mention it in the last video, and I didn't bring it up in this one. There. Mea culpa.
Ok, let's talk about the Galamoth fight for a bit. Someone called out in the comments that I did it in a "broken" manner by showing off the use of the Beryl Circlet, the teleport strikes, and the Alucard Shield/ Rod combo all in succession. I suppose that this is a fair point, but I don't think that there's a "right" way of handling this battle as Galamoth is a pretty hard boss and has a stupid amount of hit points. Sure, I suppose you can attack him little and then turn into Mist to avoid the lightning attacks, as was mentioned in the video, but we don't have time to do it that way with his HP count slowly whittling away. Honestly, I thought just going to town on him with the Beryl Circlet equipped would have been enough, but the clock was ticking so I threw in both other methods to get things over with instead of showing side videos of me just steamrolling him, which was the original plan. Incidentally, the first time I killed Galamoth 20 years ago was with teleport strikes and the Osafune Katana. I had the timing down to frames of animation, and in the right mode, could kill him without losing a single point of damage. But that was a long time ago. I never even heard of the Shield Rod combo until I was in my third year of college almost 3 years later, and didn't know about the hidden room with the Beryl Circlet until probably close to the same time. See? Without ubiquitous internet, we just had to fend for ourselves.
Of course, there are also videos floating around YouTube that prove that he can be hit stunned by getting to the ledge behind him and smacking him in the face. I have never tested this myself, but if I can get to it in the next few days, this might be thrown into the final video.
Here's something: Upon re-watching it, I'm also noticing that a speech impediment has formed when I speak quickly. It's weird because I'm a guy that used to basically talk for a living, and I do so relatively fast. I like getting in front of people and rambling, and had a pretty articulate delivery. As I've gotten a little older, though, I'm noticing that I'm starting to stumble with that delivery and mumble a little bit, and these videos have really confirmed this. Probably more than you wanted to know, but these Appendices are just as much for me as they are for you.
So one more to go. Just to temper your expectations now, the next episode should be on the shorter side from the where I'm sitting at the moment. I know that we're at the end, but obviously, there aren't any more new environments to deal with, so there's certainly less to show. That won't mean that it's only going to be the final boss fight and that's it, though, so please look forward to it.
Yes, indeed, this is the episode I dreaded making most.
As you'll see in this week's video, there just isn't that much to say about the Reverse (Reverce?) Caverns, and the slow travel and tedious mapping makes for a real slog. Since I've been cobbling together two or three sections of the Inverted Castle, each new episode has been about 20-25 minutes long, and that's kind of lengthy. Knowing that it would take me at least that long to get through this area, though, meant for this section to have it's own unique show, and one that you may find ...uh... kind of boring.
But stick around to the end! All of the really interesting bits are packed into the back half, including two things that I probably should have mentioned: the fact that by skipping the Death encounter at the beginning of the game means that you can essentially break it the moment you acquire the Shield Rod (since you already have the Alucard Shield), and that the wooden bridge that covers the entrance to the Cave magically reappeared at the end of the episode. Thankfully, by leaving the screen and coming back it once again evaporated, but this is a glitch that I had never seen before, and in no way can I recreate it. Since there are several sources on the internet where Iga claims the game is practically held together by Scotch tape and hope, I'm not super shocked to see something like this, but I probably should have busted out the microphone and called it out. Aaaah well.
The good news is that, surprise, this video showed up only a little more than a week or so since the last one. Let's call that a nice side effect of just not having that much going on in this one, but that might be a little reprieve compared to the next two, which should be packed. And yes, there will be two more. I've just decided before writing this that finishing the game in the next episode might be a little too much, and I can use the final battle with Dracula and the credits sequence as a sort of final appendix for stuff that didn't fit anywhere else, like the multiple endings. I know I've said this plenty of times, but I'm writing this on October 3rd, and though there's no specific date that we can refer back to as the actual release of the game in the US, we're in the advent of its 20th anniversary, and that's the end goal. Keep my rickety old laptop and I in your thoughts over the next few weeks.
Thanks again for watching, and enjoy the new video (please).
Whoo, things are moving along pretty fast, now. But, I suppose that you might not think so. That's fine.
As this episode of the series again reminds us, the Inverted Castle isn't exactly a second full half. If anything, the IC is maybe a little more than a third of the content of the game; there aren't many new enemies, there are very few new relics, and no ability walls to keep us away from wherever we want to go. Though this episode is a little long with some dense stretches of silence (sorry), tackling three sections of the IC in each video has now become the standard for just this reason. If I did them one-by-one like the first castle, you would be be bored to death.
Along with the format change of the episode, the construction evolution really came into play here, too. By that, I mean I just get through the locations at a steady pace and no longer have to stop and stand around so the voice over can finish. It can sometimes make me edit in creative ways (which is really a good thing, I suppose), but now I can write a script, record it, and then just plug things in where they fit, which is nice. It also sort of helps that I haven't really needed to multi-window much in this and the last episode, either. The references the game makes are still interesting, but not so complex that they callback to multiple games in the series anymore. Sure, this could all change when we get closer to the Galamoth fight, but as far as editing goes, this was an easy one to put together.
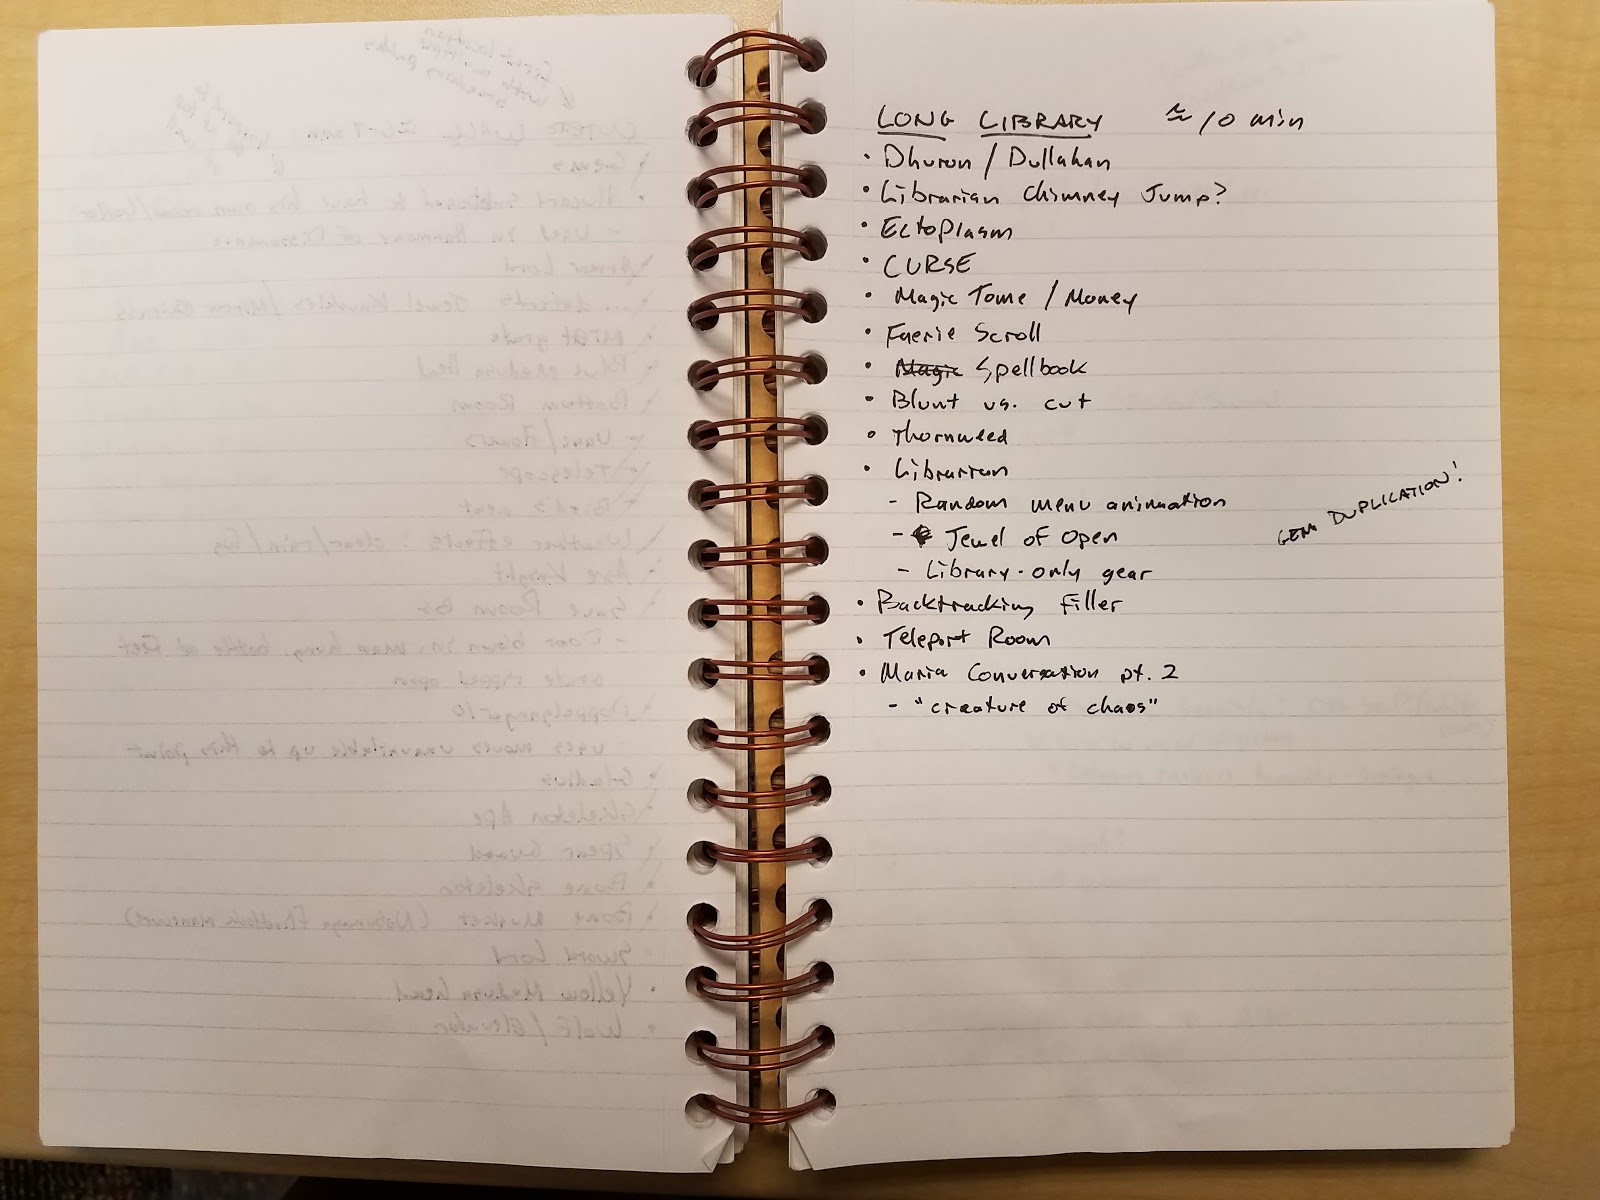
From a navigational perspective, though, it was really hard. I promise to scan my noted map and share it at some point so this all makes a bit more sense, but two of the three locations in this episode interlock, and that doesn't exactly make things easy to map without some bit of backtracking and a lot of forethought. The next episode, thank God, is made up of three discrete locations, but this one was something I really puzzled over for a long time.
Apropos of nothing: Against all common sense, Konami is releasing a port of the Castlevania arcade game Haunted Castle on the PS4 today. I'd like to think that they know these videos are coming and just want to cross promote them, but that would be stupid because nobody's making any scratch off of this whole venture. Haunted Castle, though, is an unquestionable piece of shit. If you want to give Konami money for it that's your business, but I advise against it.
Again, thanks for watching. See you in a few weeks
For this video, I did something a little bit different. Knowing that there's going to be a bit more dead space for the lack of new enemies and items, I altered the usual flow of the videos to basically get through it as quickly as possible. This changes the timing of the recordings, though. Basically, this is how the sausage was made until today:
Take location notes. Copious location notes
Write the script and then edit
Record the voice over dialog and edit
Notate the dialog timing (ie- it takes x amount of minutes for me to talk about y)
Practice run through the section I want to record
Capture game footage with the dialog timing list and a stopwatch
Edit the video together
Record pickup VO and handle minor fixes
Render and rejoice
It's a pretty good system, if a little time intensive. But things are different in the inverted castle, though, so while I'm still following the same steps that I normally would, it's less likely that I'll talk about each notable thing in the order in which they appear, like the Azaghal in this week's episode. I think it makes the flow a little better since there's going to be less standing around, but it means more pickup VO recording to say things like "that thing we saw a second ago," or "earlier, we did this or that." I hope you all find this to be a better fit for future videos.
Other than that, I'm trying really, really hard to keep to a two week schedule from now on. This is obviously not a full-time job for me, and I don't have a ton of time to throw at side projects, so I hope you understand if I slip here and there. But I would like to have the final episode up in time for the game's 20th anniversary of the NA release, which means I need to get moving. I've already laid out a pretty good pace and mapped my next stops, so it's just a matter of getting back to the notes now. Since I'm doubling (and in one instance, tripling) up on locations for the inverted castle, I think I can pull it off.
We need to talk about design intention, and pretty badly.
The point of making the Annotated Symphony of the Night was not to give you a history lesson. It was to find a place to curate everything that we could possibly know about the game from what was on-screen to what we can glean from supplemental material. While the meat of what's in there is a catalog of where names and locations come from, very little of it is speculating about what X design decision might mean or what Y location could infer. Just about everything is cited. When it's not, I try to be clear that mine are either calm observations or ancillary thoughts.
The reason behind this is pretty simple, really: unless Koji Igarashi or Toru Hagihara is sitting down with you and telling you what exactly was on their mind when they made this game, we have no clear idea of what their intentions really were. Sure, we know from interviews that IGA is a big fan of Dracula's Curse, so we can infer that it was a good reason to use Alucard as a protagonist and shoehorn the other guys in as bosses, but we don't really know (or need to know) any more than that. I make a point of surmising that there's a rough optimal path that the designers left bread crumbs to find several times in the videos, but without any actual evidence of that we can refer back to for proof, then who knows?
It's fine that you think that I did this because I'm not using a graduate degree in late Renaissance history or something (which I hope nobody actually has, no offense). There's a lot of that in the game if that's all you're looking for. But that's not what's happening here. We actually get design intention and a shiltoad more, but work that's cited and searchable. We're annotating the game, not just a Tolkien reference book, after all.
Having said that, the inverted castle is going to be a logistical nightmare of planning, which I didn't think that far ahead about, honestly. In this video, I say that I'm going to take care of each area in its entirety for the sake of making them easily digestible, but the more I stare at the map and plan the route, the less likely that's actually going to happen. When this is all over, I should probably scan or photograph my notes for you to get a sense of the mess that this was to structure. I think I have a good plan in place, but since there are no discrete doors to gate our progress in the second phase, it's actually harder than you think to get through it all with as little backtracking as possible (and that's one of the golden rules from day 1). I think I sort of painted myself in a corner with where I left off with this week's video. Grrr.
Last thing to note is that, yes, I need to start picking up the pace. I sort of dumb luck-ed into being able to finish this project in time for the 20th anniversary of Symphony's release, and that was where I was hoping to end. But we're talking October, here, which means I only have about three months to go. By my early reckoning, that would be six more videos (SIX!) between now and then.
Guess I gotta get crackin'.
Thanks again for watching. Here's this week's episode.